How to Make an AI Animation From Text: Style, Characters, Shots, Final Cut
Short answer: To make an AI animation from text, write your idea in one sentence, pick one animation style and keep it as a fixed style prompt, and design your characters once. Then write one prompt per shot, generate the shots, check that the look holds from shot to shot, and join them in order into one short.
The rule that saves the most time: the style and the characters are decided once, before the first shot. Only the shot description changes between prompts.
AI video models can turn a sentence into a moving clip, but one clip is not an animation. An animated short is a run of shots that belong together: the same art style, the same characters and a story that moves forward. Getting there is mostly planning. If you have never made a single AI clip, start with how to make AI video, and to compare the tools behind the shots, see our roundup of AI video generators.
The method below follows how Wandura's own open-sourced animation projects were built: Anime Production, a cel-shaded 2D anime sequence, and Kök Börü, a hand-painted short. Both were made in Cinema Studio from a locked style prompt and character sheets.
1. Write the idea in one sentence
Before you open any tool, write the story in this form:
[Character] wants [something], but [something gets in the way], and in the end [what changes].
For example: A small paper fox wants to carry a lantern home across a rainy city, but the wind keeps blowing the flame out, and in the end a stranger's umbrella keeps it lit.
That sentence tells you who to design, where the story happens and what the last shot must show. For a first animation, keep it small: one main character, one or two places, one change.
2. Pick one animation style and lock it
The Text to Video composer on Wandura has no style menu: the look comes from what you write. Decide it once and write it as a fixed block you paste into every prompt. Wandura's project pages call this the style lock. What Wandura shows today:
| Look | What Wandura shows | Where to start |
|---|---|---|
| Cel-shaded 2D anime | The Anime Production project, built from a "modern cel-shaded 2D anime" style lock | Cinema Studio or Text to Video, with an anime style lock |
| Hand-painted 2D | Kök Börü, a painterly 2D short with a gouache feel and visible brushwork | Cinema Studio, with a painterly style lock |
| Anime, chibi or fantasy character art | A style menu in the character generator: Realistic, Anime, Fantasy, Chibi and Cyberpunk | Character sheets, before you animate |
| Live action turned into animation | Video to Video restyles footage into a look you describe, such as anime, watercolor or claymation | Video to Video, from a clip you already have |
Other looks, such as a 3D-rendered or stop-motion feel, are something you describe and test. The Text to Video model list does not label any model as a 3D or cartoon model (PixVerse V6 is labelled "Stylised"), so run the same style lock on two or three models and keep the one that holds it most closely. A style lock for the fox story:
Modern cel-shaded 2D anime, clean linework, flat colour fills with soft two-tone shading. Warm amber palette for the lantern, cool blue-grey for the rainy streets. Not photoreal, not 3D, no painterly texture.
Say what the style is not, as both Wandura projects do ("Not painterly, not 3D"). Models drift toward their default look when the prompt leaves room.
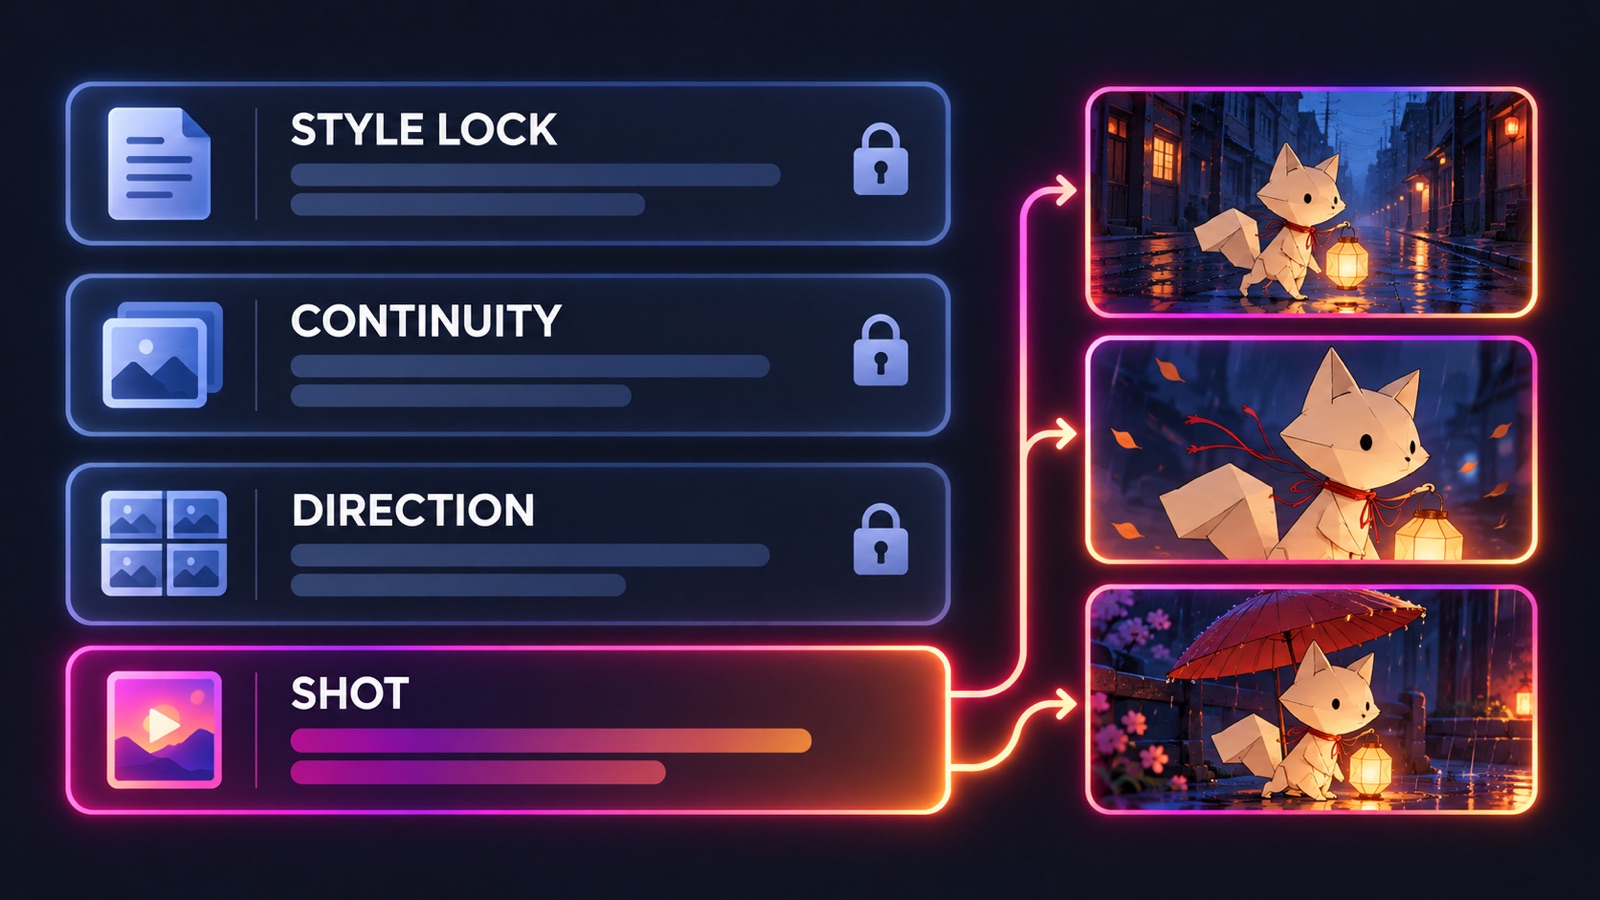 Three blocks stay the same in every prompt. Only the shot block changes.
3. Design your characters once
Characters that change face, hair or clothes between shots make an animation look like separate clips. Fix them first.
- Make a character sheet. The AI Character Generator turns a one-sentence description into a front-view and full-body sheet on a neutral background, in a style such as Anime or Chibi.
- Draw anime-style stills if you need them. The AI Anime Generator draws characters and scenes in anime style from a text description, useful for key art or backgrounds.
- Write a continuity block. Describe each character the same way every time, with one detail that is easy to check: a small origami fox folded from cream paper, black ink-dot eyes, a red string tied around its neck. Paste it word for word into every shot.
- Save the references. In Cinema Studio you keep characters, backgrounds and props in a project and add them as references to each shot, so the same faces and places come back.
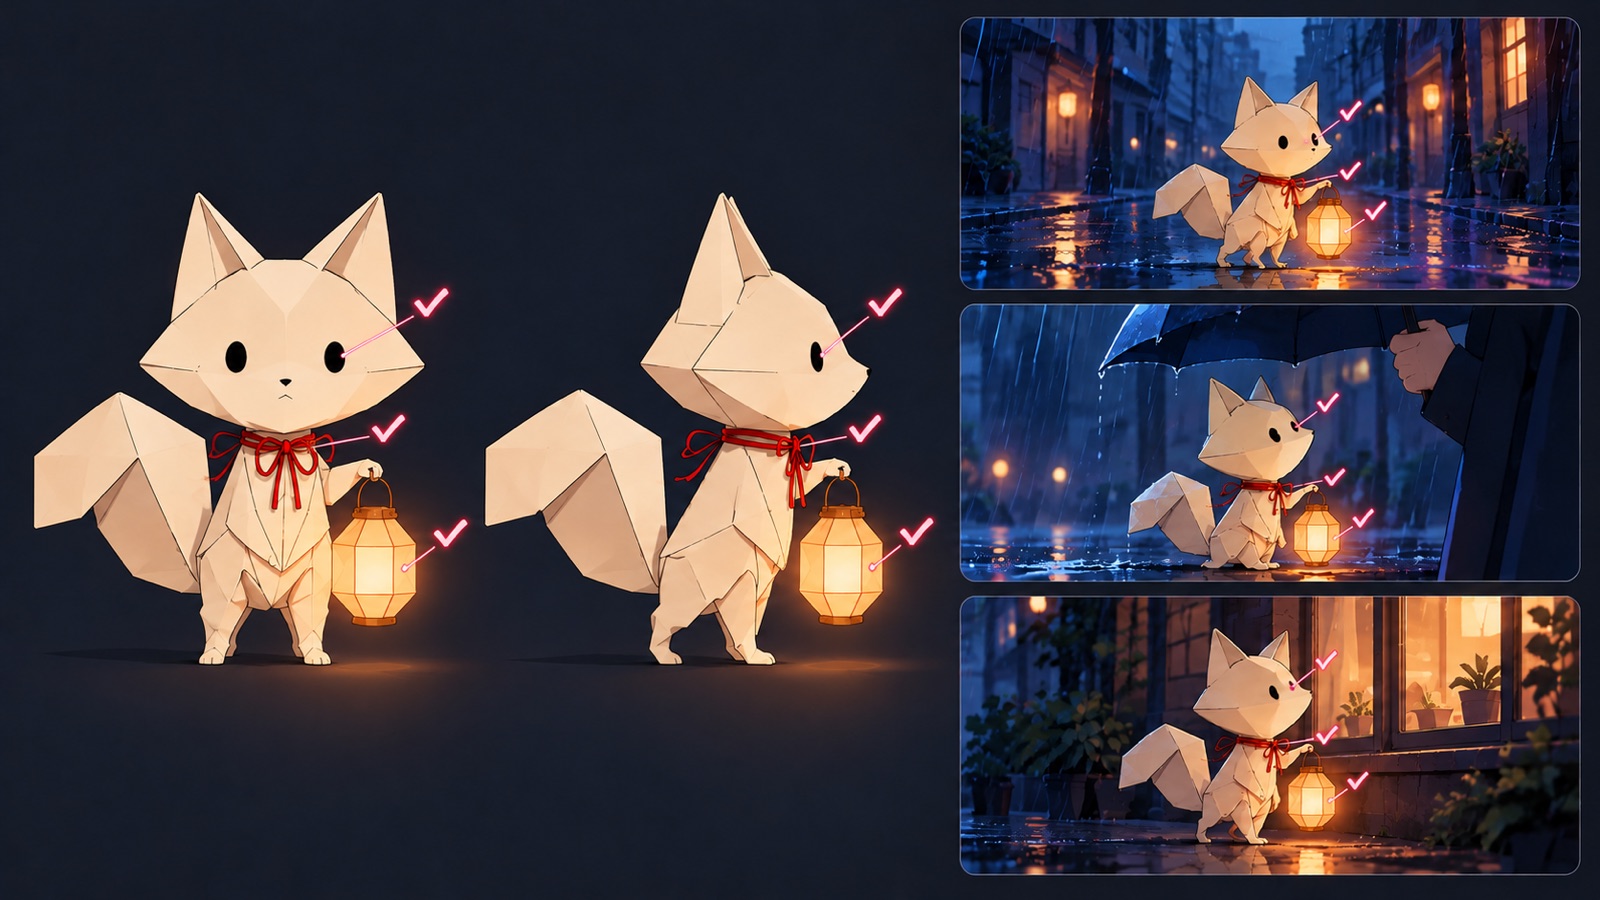 One sheet, one description, the same fox in every scene.
4. Break the story into shots and write one prompt per shot
One shot is one continuous clip with one clear action. For the fox story:
- Wide: the rainy city at dusk, the fox's small lantern the only warm light.
- Medium: the fox walks along a wet pavement, protecting the flame with one paw.
- Close: a gust of wind, the flame shrinks, the fox's ears flatten.
- Medium: a stranger's umbrella tilts over the fox and the rain stops falling on it.
- Wide: the fox reaches a lit window at home, lantern still burning.
Wandura's animation projects split every prompt into four blocks: style lock, continuity, direction (camera language) and shot, the only block that changes. Shot 3 put together:
Modern cel-shaded 2D anime, clean linework, flat colour fills, cool blue-grey rainy street, not photoreal, not 3D. A small origami fox folded from cream paper, black ink-dot eyes, a red string around its neck, holding a tiny paper lantern. Static close-up at the fox's eye level. A gust of wind hits, the lantern flame shrinks, the fox's ears flatten and it turns its back to the wind.
Keep one action per shot, always name the camera move, and note where the character is at the end of each shot so the next one starts from there. If a character needs to copy a real performance, such as a dance or a wave, Mimic Motion transfers the movement from a reference video onto a still character.
5. Generate the shots
- Cinema Studio, for a full short. Wandura's route for animated scenes and shorts: build each shot from your project assets and choose the model, aspect ratio, resolution, duration and shots per run, with the cost shown before you generate. It opens after you sign in.
- Text to Video, for single shots. Text to Video builds a whole clip from your words. Each model shows its own lengths, resolutions and sound options; draft on a cheaper model, then re-run the prompt that works on the one you want.
- Image to Video, to animate a still. Image to Video animates a picture, such as your character sheet, from a motion prompt.
- Video to Video, to turn footage into animation. Act a scene out on your phone, and Video to Video keeps the motion while repainting it in the style you describe.
Keep the take that matches the style lock, not the one that looks most impressive on its own.
6. Check continuity, then join the shots
Play neighbouring shots back to back: a change in colour, outfit or line style shows at the cut. Regenerate the shot that drifts. In Cinema Studio, the film editor joins up to 12 shots in order into one film of up to 3 minutes, adds a music track and exports a single video, as described on the AI Movie Maker page. Titles and on-screen text still need another tool.
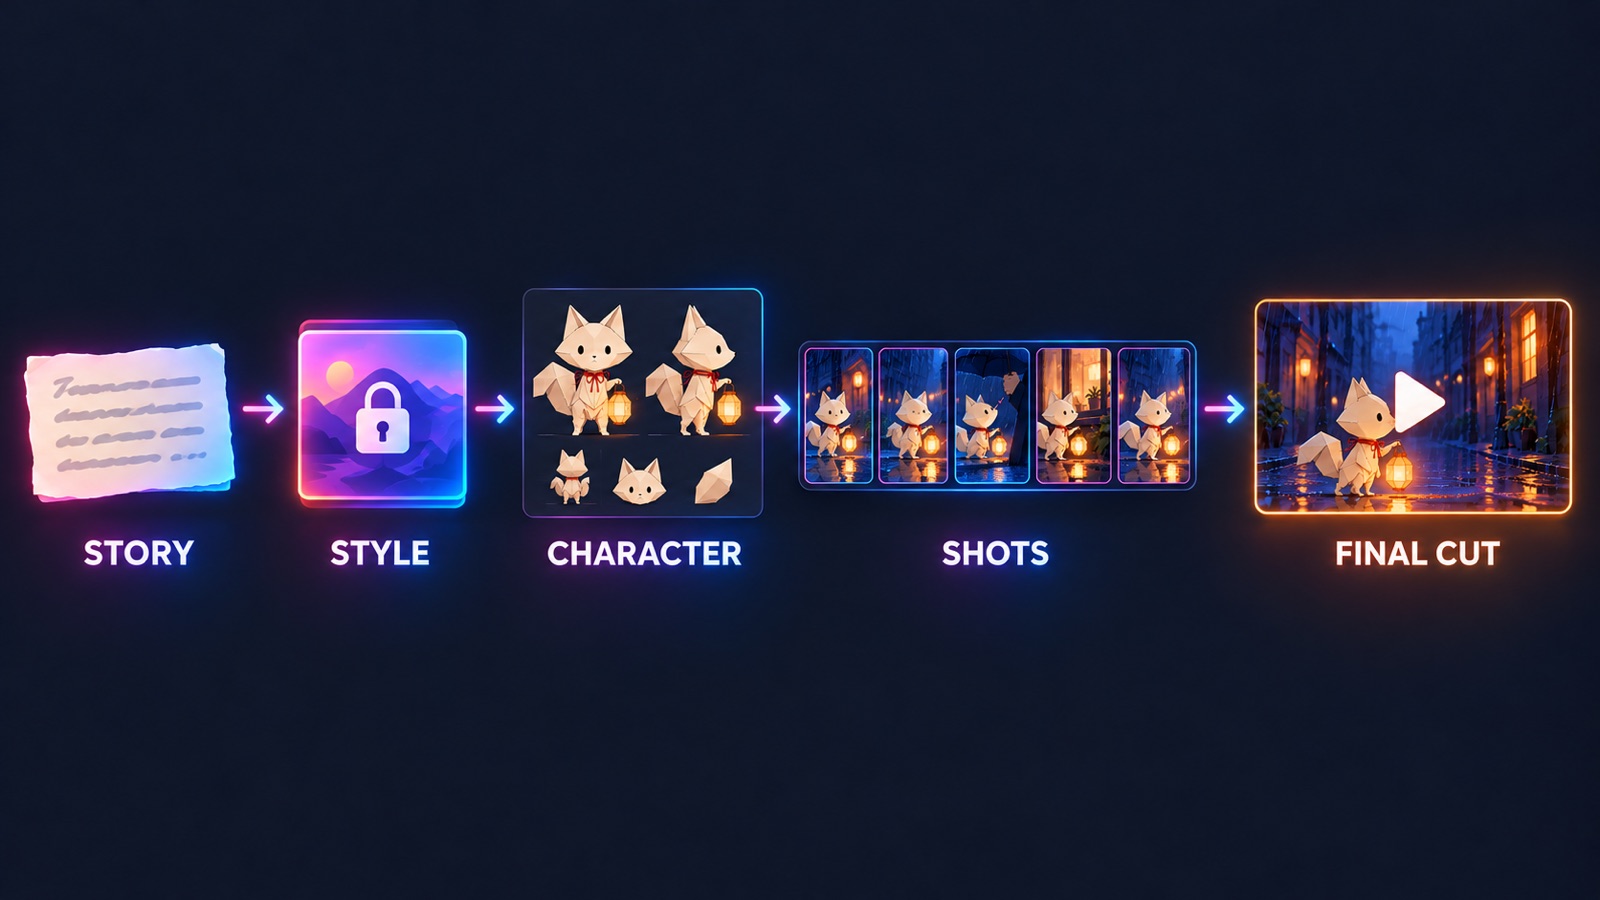 From one sentence to a shot list to one finished animation.
For a story in several episodes, start from a script: the AI Short Drama Maker in Drama Studio splits it into episodes, characters and scenes, storyboards each scene and turns it into vertical video.
A quick checklist before you share
- The last shot shows what changed.
- The same style lock and character descriptions are in every prompt.
- Every shot has one action and a named camera move.
- Neighbouring shots match in colour, outfit and line style.
Frequently Asked Questions
How do I make an AI animation from text?
Write the story in one sentence, choose one animation style and write it as a fixed style prompt, design your characters once, then write one prompt per shot that repeats the style and character description. Generate the shots, check that neighbouring shots match, and join them in order into one video.
Can AI turn a written story into an animation?
Yes, shot by shot. Break the story into short shots with one action each, generate each shot from a prompt or from your saved characters, then edit the shots together. For a longer story in episodes, Drama Studio on Wandura splits a script into episodes, characters and scenes first.
What animation styles can I make on Wandura?
The style comes from your prompt. Wandura's own projects show cel-shaded 2D anime and a hand-painted 2D look, the AI Character Generator has Realistic, Anime, Fantasy, Chibi and Cyberpunk styles for character sheets, and Video to Video can restyle footage into looks such as anime, watercolor or claymation. Other looks are worth testing on more than one model.
How do I keep the same character in every shot?
Make a character sheet once, write one fixed description with a detail that is easy to check, and paste it word for word into every prompt. In Cinema Studio, add the same saved character as a reference to every shot, then compare neighbouring shots and regenerate any that drift.
Do I need to draw or know animation software?
No. You describe the style and the characters in text, and the shots are generated from your prompts and saved references. Drawing skills help with judging the result, but they are not needed to make it.
How long can an AI animation be on Wandura?
In Cinema Studio, the film editor joins up to 12 shots into one film of up to 3 minutes. How long each shot can be depends on the model you pick, and the composer shows the options for that model.
Can I try text to animation AI without paying?
New accounts get free credits on signup, enough to try Wandura with a first result that carries a wandura.ai watermark. After that, each generation is paid in credits, and the cost is shown before you create.
Keep reading
How to Keep a Character Consistent in AI Video, Shot by Shot
How to Make a 30-Second AI Horror Film: Silence, Knock, Choice
Start creating with 70+ AI models
One account, one credit balance, every model. Pay only for what you generate.
See pricing